Zorro
http://www.the-commodore-zone.com/articlelive/articles/24/1/Zorro/Page1.html

By TCZ webmaster
Published on 11/28/2006
This is a game based around the story of the legend of Zorro, including all the classic Zorro ingredients, a kidnapped senorita, an evil enemy leader and his henchmen and of course the obligatory swordfight! The same company that brought you the mighty Bruce Lee developed this game. The graphics are similar, crude but functional. The sound is quite basic, with rather timid sound effects and the music is short and repetitive. This game has been very harshly treated since its release and in my opinion, totally underrated.
End Game Sequence
 Zorro by Datasoft |
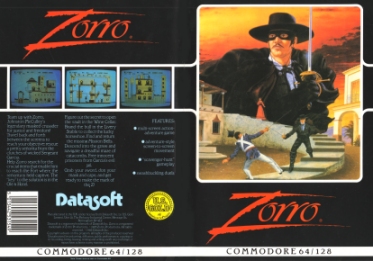
Published: 1985, Datasoft Programmer: James Garon Musician: John A. Fitzpatrick Genre: Arcade Options: 1 Player Media: Disk/Tape Magazine Review: Zzap!64 78% issue 10 (1985) Downloads: Map, Faq, Instructions Team up with Zorro, Johnston McCulley's legendary masked crusader for justice and freedom! Travel back and forth between the screens to reach your objective: rescue a pretty senorita from the clutches of wicked Sergeant Garcia. Help Zorro search for the crucial items that enable him to reach the Fort where the senorita is held captive. The key to the solution is in the Ole 6 Hotel. |
|
This is a game based around the story of the legend of Zorro, including all the classic Zorro ingredients, a kidnapped senorita, an evil enemy leader and his henchmen and of course the obligatory swordfight! The same company that brought you the mighty Bruce Lee developed this game. The graphics are similar, crude but functional. The sound is quite basic, with rather timid sound effects and the music is short and repetitive. This game has been very harshly treated since its release and in my opinion, underrated. It requires more perseverance than Bruce Lee, a few of the puzzles are rather obscure and repetitive, but if you look past this, it can be a fun, enjoyable game, with some amusing moments - like the spring board sequence which catapults you in the air and the branding of the bull. Ignore the reviews and the criticisms; this game is well worth checking out. |
|
|
WARNING: Playing this flash video will reveal the end game sequence of Zorro, do not press play unless you are sure, otherwise it may spoil your enjoyment of the game. Zorro by Datasoft |
 Zorro Advert by Datasoft |
|
CHEAT Load or reset the game, then execute the following BASIC command before running or restarting the program. Unlimited lives: POKE 5432,127 Unlimited lives (alternate): POKE 5359,1 Set number of lives: Note: X represents the desired number of lives. POKE 6431,X MAP |
|
 Zorro Catacombs Map |
|
|
On the following pages, exclusive to The Commodore Zone is the definitive and complete Zorro walkthrough by Paul Newport that has never been published before. Also available in the Zorro walkthrough, is an exclusive 37 minute video stream of Zorro from beginning to end, split into two parts. Part 1 - The Scavenger Hunt and Part 2 - The Catacombs. Editted by TCZ and includes theme music from the film Mask of Zorro and The Good, The Bad, And The Ugly. In the main category of the games database you will find the game Zorro, including external links to other Zorro content. If you would like to comment on this article then please use the comment/rating feature available. The text excerpt in italics below the credit information is taken from the cover of the game and ©Copyright 1985 Datasoft. Thank you to the website GameWinners for the cheat mode poke codes and instructions. GameWinners. |
|
Walkthrough - Introduction
|
WARNING:
Playing this flash video will reveal the end game sequence of Zorro, do not press play unless you are sure, otherwise it may spoil your enjoyment of the game. |
|
|
Part 1 - The Scavenger Hunt |
Part 2 - The Catacombs |
|
video streaming of Zorro from beginning to end, split into 2 parts, with a combined running time of about 37 minutes. Features theme music from the film Mask of Zorro ©Copyright 1998 James Horner and The Good, The Bad and The Ugly ©Copyright 1966 Ennio Morricone |
|
 Zorro by Datasoft |
Welcome to the definitive walkthrough guide for the Commodore 64 (C64) version of Zorro by Datasoft in 1985. The same company that brought you, the hugely popular Bruce Lee. This computer game version of the Legend of Zorro was not well received by reviewers or gamers upon its release in 1985. Unfortunately due to some rather obscure puzzles and at times, tedious and repetitive game play, it made the game less appealing than Bruce Lee. For all its faults and there are many, with a little perseverance, it can be an enjoyable and rewarding arcade adventure, with some charming moments, like the branding of the bull with the iron and catapulting into the air via a conveniently left spring board and a dazed Garcia guard! |
|
The computer version of Zorro is a strange beast, he can leap across buildings, fall 50 feet and land like a feather, neither a scratch to his head or a crease in his cape, even perform masterful tricks, such as balancing a large plant pot on his head, while simultaneously climbing up a ladder. Zorro also suffers from OBD – 'Obsessive Bouncing Disorder'. Trust me, when you play the game you will understand exactly what this means! Yes, this is the C64 version of the mighty Zorro! Forget what the critics say – this game is nowhere as bad as they make out. It may not be the gem that is Bruce Lee, its more of a diamond in the rough, but it deserves, just a little more respect. This walkthrough details everything you need to do to successfully complete Zorro. There are 20 different screens in Zorro, with Screen 8 - The Ole Hotel being used continually throughout the game. There are 38 steps to complete Zorro, each step is numbered from 1 - 38 with the Screen number opposite. There is an image for each Screen number, that appears in an appropriate place, throughout the walkthrough. This will allow you to get your bearings for what screen you are looking for. It takes approximately 40 minutes to complete Zorro, it can be slower or faster depending on your speed of progression. It can take a lot longer if you lose your way in the Catacombs... Use the Catacombs Map on the previous page for reference. The Catacombs is actually quite straightforward, just move to where the moneybag is on the screen and collect it. Then move in the direction that the moneybag is pointing. For example, if the moneybag is at the bottom right of the screen, and there is a ladder below the moneybag, then move down the ladder to the next screen. It's that simple. There is a complication later on in the game, when you need to navigate the Catacombs for a 2nd time. However, this time the moneybags will no longer be present! This is where the Catacombs Map comes in handy, use this to show you where the moneybags were! So you can easily progress, without getting lost. Best of luck and Enjoy! |
|
Walkthrough - Part 1
 Zorro (SCREEN 1) by Datasoft |
 Zorro (SCREEN 2) by Datasoft |
|
1) Screen 1 - The Well When you first start the game, you will find Zorro at the bottom of the screen, near a tree of vines and a senorita waving a handkerchief at you from above. Shortly, a guard, sent from your enemy, the evil Sergeant Garcia, will kidnap the senorita. Don’t bother trying to catch the guard who is running off the screen with the senorita, there’s no point you can never catch him, the whole point of the game is to rescue her, and so your quest now begins. Your first task is to collect the handkerchief, dropped by the senorita. Climb up the tree of vines, to reach the balcony above. At the bottom left of the screen is a well. Jump off the balcony to land on the top of the well. Jump off the well to the right to swipe the handkerchief in mid-air as you drop down. Repeat the procedure above, to end up on top of the well, but this time use the ladder to climb down to Screen 2. 2) Screen 2 - The Cavern Get near the end of the ledge and jump off to the right to land on the first red bouncing ball in the water below. Bounce up and down a few times, and then jump right to grab the small ladder. Climb up and move to the end of the rocky ledge, jump up and right to grab the handrail, move Zorro into position so that you are directly above the 2nd red bouncing ball in the water below – then fall off. After a few bounces on the ball, jump off to the right to land on the rocky ledge. Move right to Screen 3. 3) Screen 3 – The Wine Cellar Jump right, off the ledge to fall down to the bottom of the screen and move left over the hole in the floor. Jump down, through the hole to Screen 4. 4) Screen 4 – The Plant Pot You need to jump off each ledge to fall to the ledge below, so you can reach the bottom of the screen, so jump right, then left, then right, then left, and you will end up at the bottom. Move to the far right of the screen. Using the yellow trampoline in the floor, bounce up and down a few times, and then jump hard right to reach the plant pot. Collect the plant pot and jump left off the ledge. Move to the far left of the screen and use the trampoline to reach the handrail above, then move right to fall on the ledge. Follow this procedure for each ledge, to get back up to the top left of the screen. When you are at the top left of the screen, use the final trampoline to jump up through the hole into Screen 3. |
|
 Zorro (SCREEN 3) by Datasoft |
 Zorro (SCREEN 4) by Datasoft |
|
5) Screen 3 – The Wine Cellar Move to the ladder on the right and climb up, jump from the ledge to the ladder in the middle left of the screen. Climb up the ladder, and then move towards the small boulder. As soon as you touch the boulder, it will start to move towards you, when it reaches the platform it will move down, jump on the platform to move down with it. When you are near the bottom of the screen, jump off right and wait a few seconds until the boulder moves back up and eventually becomes parallel with the other moving platform to the right, the boulder will move onto the 2nd platform and start to move down. Climb up the ladder on the right and again jump from the ledge to the ladder in the middle left of the screen. Climb up and then move onto the first platform that the boulder original moved onto. The weight of the plant pot will take you to the bottom of the screen and the 2nd platform with the boulder will start to move up, when you reach the bottom, the boulder will reach the top and move right to fall down on the 3rd platform, this will move the platform down, opening the door to the vault of the wine cellar on far right. Drop the plant pot, as it is no longer required. Jump left onto the ladder and climb up to the ledge. Move left off the screen, back into Screen 2. 6) Screen 2 – The Cavern Move to the edge of the ledge, and jump left onto the nearest red bouncing ball. Be careful here, you need to stop bouncing so you can make a short jump to the next red bouncing ball. Then bounce a few times on the ball and jump left to grab the small ladder. Climb up and then jump right, off the ledge and you should fall on the first bouncing ball. Bounce a few times, and then jump hard left to reach the ledge. Climb up the ladder to Screen 1. 7) Screen 1 – The Well Jump right off the well and continue right (you need to skip the next two screens, Screen 5 - The Saloon and Screen 6 - The Apartment, as there is nothing to do here yet – but there will be shortly!), continue right until you reach Screen 8. Try to avoid any of the Garcia guards; otherwise you will get into an unnecessary sword fight. |
|
 Zorro (SCREEN 5) by Datasoft |
 Zorro(SCREEN 6) by Datasoft |
|
8) Screen 8 – The Ole Hotel (Wine Bottle) This is a location you will become very familiar with as the game progresses, a lot of items needed to complete various puzzles throughout the game start here. The first puzzle for you to solve, involves the Wine Cellar, you need to collect the Wine Bottle from the locked Hotel room at the top left of the screen. At the bottom of the screen, to the right of the ladder, you will see a black key. Collect this key and move to the yellow Hotel couch. Jump onto the middle of the couch and bounce up and down a few times. Jump hard right to reach the ledge above. Climb down the ladder on the right and move right to Screen 9. 9) Screen 9 – The Mission Climb the ladder on the right, and then move left and climb up the other ladder. Move right to the last ladder and climb up to reach the ledge. Move to the edge and Jump left to the empty bell towers. Move to the end of the ledge and jump left to the lower platform (which is the Ole Hotel) and continue left to Screen 8. 10) Screen 8 – The Ole Hotel (Wine Bottle) Be careful here, it’s very easy to fall off without jumping sufficiently to reach the Hotel Room. If you fall, it's ok, but you will have to climb up all the ladders on Screen 9 again! You’ve been warned! Jump left off the ledge to the locked door on the platform below. Walk through the door with the key, which will unlock it. Move to the end of the ledge and jump left to the open room, which stores the Wine Bottle. Collect the Wine Bottle and jump right off the ledge and fall all the way down to the couch. Wait until you stop bouncing, so you can jump off the couch. Continue to move left to Screen 6 - The Apartment and then continue left to Screen 5 - The Saloon. |
|
 Zorro (SCREEN 8) by Datasoft |
 Zorro (SCREEN 9) by Datasoft |
|
11) Screen 5 The Saloon When you enter Screen 5 again, with the wine bottle in hand, you will observe a number of Garcia guards drinking. Look to the bottom right of the screen and you will see a rather portly shaped individual, partially drunk. This Garcia guard will unknowingly help you to reach the platform above. You need to give the Garcia guard the wine bottle. This is slightly more awkward than it first appears, as you need to jump into him. To do this, move a few paces to the left of the Garcia guard, and run and jump hard right, as you fall down past him, he will take the wine bottle and start drinking, shortly becoming inebriated. Zorro must then partake in the rather unflattering activity of bouncing on the belly of a drunken Garcia guard. Jump up onto the belly of the Garcia Guard, when you have bounced a few times, jump left to reach the platform above. Then climb up the ladder at the end of the platform, be careful though, as your next task is awkward. You need to sword fight a Garcia guard but not kill him, basically you will be fencing him with your sword to push him ever closer to the edge of the ledge and eventually falling off, where he will fortunately hang like a daisy on the Chandelier below, in doing so, the extra weight will move the winch that is attached to the chandelier up, so it will lift the block at the very bottom of the screen, allowing a clear passage to the Wine Cellar, via a ladder which you can climb down. The best way to get the Garcia guard to fall off, is to wait until you see the Garcia guard approaching through the far left doorway - you can tell this by the shadow at the door, if it turns black, then you know a Garcia guard is approaching. Wait for the precise moment you see the shadow looming at the door, and then quickly move up the ladder to the platform and then move as close as you can to the Garcia guard. Use your sword to fence him to the end of the ledge, where if successful, he will fall off and voila, you have access to the Wine Cellar. Jump left off the ledge to fall down to the bottom of the screen. Move to the ladder and climb down to Screen 3. 12) Screen 3 – Wine Cellar Continue climbing down the ladder until you reach the very bottom. Move to the left and collect the golden Goblet. Climb all the way up the ladder to Screen 5, and then move right and skip Screen 6 - The Apartment, to arrive at Screen 8 - The Ole Hotel. |
|
 Zorro (SCREEN 3) by Datasoft |
 Zorro (SCREEN 5) by Datasoft |
Walkthrough - Part 2
 Zorro (SCREEN 8) by Datasoft |
Zorro (SCREEN 9) by Datasoft |
|
13) Screen 8 – The Ole Hotel (Branding Iron) Yep, it’s this location again, get used to it – you’re going to be seeing it a lot! You need to collect the Branding Iron from the locked room at the top left of the screen. At the bottom of the screen, to the right of the ladder, you will see a black key. Collect the key and move to the yellow Hotel couch. Jump onto the middle of the couch and bounce up and down a few times. Jump hard right to reach the ledge above. Climb down the ladder on the right and move right to Screen 9. 14) Screen 9 – The Mission Climb the ladder on the right, and then move left and climb up the other ladder. Move right to the last ladder and climb up to reach the ledge. Move to the edge and Jump left to the empty bell towers. Move to the end of the ledge and jump left to the lower platform (which is the Ole Hotel) and continue left to Screen 8. 15) Screen 8 – The Ole Hotel (Branding Iron) Jump left off the ledge to the locked door on the platform below. Walk through the door with the key, which will unlock it. Move to the end of the ledge and jump left to the open room, which stores the Branding Iron. Collect the Branding Iron and jump right off the ledge and fall all the way down to the couch. Wait until you stop bouncing, so you can jump off the couch. Continue to move left to Screen 6 - The Apartment. Stop at the pineapple tree and then climb up to the very top. Then jump left to fall on the platform below. Move left to Screen 7. |
|
|
Zorro (SCREEN 6) by Datasoft |
 Zorro (SCREEN 7) by Datasoft |
|
16) Screen 7 – The Livery Stable This is one of the more amusing and fun parts of the game. At the very bottom of the screen is a bull, standing near a horseshoe hanging on the livery wall. You need to brand the bull with the iron so you can collect the horseshoe. Jump left over the barrel, to fall down on top of the barrel below. Move left and climb down the ladder to fall down to the bottom of the screen. Now place the branding iron in the middle of the furnace, you can do this easily by just jumping right onto the furnace. When the branding iron is placed, jump off to your left and use the pump on the left, by bouncing up and down on it, to blast air into the furnace, to make it flame and heat the iron, you will know when you have succeeded, you will see the branding iron turn red. Quickly jump off the pump to the right, and jump up onto the furnace, collect the branding iron and run as fast as you can towards the bull, poke the bull with the branding iron, the bull will freak and move off the screen to the right. A nice touch here is the Zorro 'Z' marking on the Bull! Use the ladder next to you, to climb to the platform above, move left and climb the ladder to just below the platform, use the handrail on your left to move Zorro across the screen to the other side, jump down off the handrail and move left and jump up to the small ladder on the far left. Climb up and then climb up the ladder above, jump right to the handrail and move across the screen to the far right. Be careful, if a Garcia guard sees you, then you will fall off for a swordfight. Using the handrail on the far right of the screen, position Zorro directly above where the bull was and fall down all the way to the bottom of the screen. Then move right to collect the horseshoe. Move right to Screen 6 - The Apartment. Skip this screen and continue right to Screen 8 – The Ole Hotel. |
|
 Zorro (SCREEN 8) by Datasoft |
 Zorro(SCREEN 9) by Datasoft |
|
17) Screen 8 – The Ole Hotel (Mission Bell) You need to collect the Mission Bell from the locked room at the top left of the screen. At the bottom of the screen, to the right of the ladder, you will see a black key. Collect the key and move to the yellow Hotel couch. Jump onto the middle of the couch and bounce up and down a few times. Jump hard right to reach the ledge above. Climb down the ladder on the right and move right to Screen 9. 18) Screen 9 – The Mission Climb the ladder on the right, and then move left and climb up the other ladder. Move right to the last ladder and climb up to reach the ledge. Move to the edge and Jump left to the empty bell towers. Move to the end of the ledge and jump left to the lower platform (which is the Ole Hotel) and continue left to Screen 8. 19) Screen 8 – The Ole Hotel (Mission Bell) Jump left off the ledge to the locked door on the platform below. Walk through the door with the key, which will unlock it. Move to the end of the ledge and jump left to the open room, which stores the Mission Bell. Collect the Mission Bell and jump right off the ledge and fall all the way down to the couch. Wait until you stop bouncing to regain your balance. Then bounce up and down a few times and jump right to the platform above. Climb down the ladder on the right and move right to Screen 9. 20) Screen 9 – The Mission Climb the ladder on the right, and then move left and climb up the other ladder. Move right to the last ladder and climb up to reach the ledge. Move to the edge and Jump left to the empty bell towers. Move next to an empty bell tower and place the bell in the tower, it will begin to ring. Move to the end of the ledge and jump left to the lower platform (which is the Ole Hotel) and continue left to Screen 8. 21) Screen 8 – The Ole Hotel (Mission Bell) Just fall off the ledge and fall down to the platform below, move left and fall down to the couch, then jump left off the couch. I’m afraid you will need to go through the same procedure again to collect the 2nd Mission Bell and place it in the empty bell tower on Screen 9. Go to Step 17 above and start over. 22) Screen 9 – The Mission When you have placed the 2nd Mission Bell, in the bell tower. Look below; at the bottom of the screen, open sesame, a grave has opened to reveal a catacomb. This is where most Zorro gamers made a huge mistake - DO NOT ENTER THE CATACOMBS! Ignore it for the moment, because you have something else to do first. Move to the end of the ledge and jump left to the lower platform (which is the Ole Hotel) and continue left to Screen 8. |
|
 Zorro (SCREEN 8) by Datasoft |
 Zorro (SCREEN 9) by Datasoft |
|
23) Screen 8 – The Ole Hotel (Trumpet) Just fall off the ledge and fall down to the platform below, move left and fall down to the couch, then jump left off the couch. You need to collect the Trumpet from the locked room at the top left of the screen. At bottom of the screen, to the right of the ladder, you will see a black key. Collect the key and move to the yellow Hotel couch. Jump onto the middle of the couch and bounce up and down a few times. Jump hard right to reach the ledge above. Climb down the ladder on the right and move right to Screen 9. 24) Screen 9 – The Mission Climb the ladder on the right, and then move left and climb up the other ladder. Move right to the last ladder and climb up to reach the ledge. Move to the edge and Jump left to the empty bell towers. Move to the end of the ledge and jump left to the lower platform (which is the Ole Hotel) and continue left to Screen 8. 25) Screen 8 – The Ole Hotel (Trumpet) Jump left off the ledge to the locked door on the platform below. Walk through the door with the key, which will unlock it. Move to the end of the ledge and jump left to the open room, which stores the Trumpet. Collect the Trumpet and jump right off the ledge and fall all the way down to the couch. Wait until you stop bouncing to regain your balance. Then move left to the ladder and climb up to the platform above. Wait until the Garcia guard has disappeared and then move left to Screen 6. 26) Screen 6 – The Apartment This is one of the funniest and most bizarre parts of the game! You will now be on a ledge; on the ground below is a springboard. You need to get a Garcia guard to jump off the ledge of the building opposite and land on the springboard, so you can jump off the ledge and land on the springboard and be catapulted up into the air to grab the handrail on the platform above. To do this you need to place yourself near the edge of the ledge, then play the trumpet and immediately jump off the ledge to the left, while doing this you will see the Garcia guard become entranced by the music, and jump off the ledge and fall onto the springboard (timing here, is crucial), if you get it right, you will fall on the springboard before he does and you will be catapulted far enough into the air, to reach the platform above. Use the handrail to move to the left to fall onto the platform. Move left to the ladder and climb up, as always keep an eye on the doors for any approaching Garcia guards, when the coast is clear, move quickly to the far right of the platform, climb up the ladder to the roof of the building, You will see a boot in a tower, move to the left and collect the boot. Jump left off the building, either on to the tree and climb down or just fall off - it does not make any difference, just get to the bottom of the screen. Move right to Screen 9. |
|
Walkthrough - Part 3
|
Zorro (SCREEN 9) by Datasoft |
 Zorro (SCREEN 10) by Datasoft |
|
27) Screen 9 – The Mission Remember that open tomb? Now its time to venture down there! Move right above the opened tomb and use the ladder to climb down to Screen 10. |
|
|
|
|
|
28) Screen 10 – The Catacombs (Screen 1 of 7) Before you enter the catacombs make sure you have at least 2 lives – this will become extremely important later on in the game when you reach Sergeant Garcia's fort. Because you will lose 1 life, because of the Senorita!! If you only have one life left, then your in trouble! But there is a way you can avoid losing a life to the Senorita, but you will need to make sure that later on in the game, when you enter Sergeant Garcia's Fort that you don't lose it, to a Garcia Guard! If you look to the left of the screen you will see a moneybag. Yep, you've guessed it - follow the moneybags again, but this time it will lead you back to where you started from. You then need to climb the ladder and enter Screen 9 - The Mission, skip this screen and move left to Screen 8 - The Ole Hotel. Then skip all the way to step 33 below. If you have at least 2 lives - then its best to just carry on and experience the full game. There are 7 screens to navigate correctly to arrive at your destination, which is a ladder leading up to Sergeant Garcia's Fort. The entrance will be decorated with three symbols, the Golden Goblet, Horseshoe and the Boot. Without these three items collected then you cannot enter the Fort. Fortunately, you have already collected all these items, so you can continue. Each Catacomb screen has a moneybag, look for the moneybag and collect it, when you have collected the moneybag move off the screen in the direction in front of it. This is crucial, move the wrong way and you will end up lost. Move to the moneybag by using the disappearing platforms, moving and non-moving ladders and ledges. Use the Catacomb Map above for reference, to help you through the Catacomb Maze. Contrary to what some people think, the Catacomb maze, at least on the C64 version of Zorro, is not random; it is the same for every game you play. When you have reached Screen 7 of the Catacomb, the entrance to Sergeant Garcia's Fort is at the top right of the screen. Climb up the ladder to move to Screen 17, be careful though, don't rush up the ladder, because a Garcia guard is moving up and down a tower in the fort and shooting. So just move to the top of the ladder and pause. |
|
 Zorro (SCREEN 17) by Datasoft |
 Zorro(SCREEN 18) by Datasoft |
|
29) Screen 17 – The Fort (Prisoners) Timing here is of the essence – you need to keep an eye on the Shooting Garcia guard and move up the ladders to the platforms to rescue the prisoners. When all the prisoners have been rescued they will build an escape route for you on the bottom left of the screen. You need to make a run for the ladder on the left of the screen. When you reach the ladder you can move up halfway so it's possible for you to miss the shooter when he is shooting from the 1st or 2nd window. When it's clear, move to the ladder on the right, you need to rescue the prisoners along the way, this is really easy just press the fire button when going past them but be really quick, you must reach the ladder and be able to go up at least halfway to ensure the shooter won't hit you. When its clear, climb up to the top of the ladder, you will be on the upper platform, you almost certainly will need to sword fight a Garcia guard here, but the advantage is – the shooter cannot hit you, so it buys you some time. You still need to rescue the remaining 2 prisoners. Move to the left and when the shooter is in the bottom window, fall down to the ledge below and rescue the prisoners, again be quick, that shooter will soon be in the top window. As soon as the prisoners are assembled at the bottom left of the screen, jump down onto them and move quickly to the left onto Screen 18, before the shooter has time to hit you. 30) Screen 18 – The Fort (Guardhouse) Here you have a similar problem to Screen 17, but it's actually a lot easier. When the shooter is about to move to the bottom window, quickly climb up the ladder to the upper platform. Avoid a sword fight, otherwise it will slow you down, just reach the ladder on the left as quickly as you can and climb down to the platform below. The shooter cannot hit you from here, but you will probably run into a Garcia guard, swordfight him if necessary, but move as quickly as you can to the far right of the platform. When the shooter is about to disappear from the bottom window, fall off the ledge and move left, then run for it, try to avoid the Garcia guard, as it will slow you down too much, keep running to the left and onto Screen 19. |
|
 Zorro (SCREEN 19) by Datasoft |
 Zorro (SCREEN 20) by Datasoft |
|
31) Screen 19 – The Fort (Senorita!) This is quite an easy screen – just keep an eye on the Garcia guard movements, and try to avoid any sword fights, move to the far left and climb up the small ladder to the platform above. Move to the far right and climb the ladder to the upper platform. There are no Garcia guards here, so you have nothing to worry about. Move to the far left and climb the ladder to the Senorita. Don’t get to comfy though – because you are about to be in for a nasty shock. The Senorita will reject your rescuing of her until you can show your affection for her! I kid you not! In a matter of moments you will be thrown off the tower where the Senorita is and lose a life and land opposite the fort bridge on Screen 20. 32) Screen 20 – The Courtyard Move left off the screen, which will lead you to Screen 9 - The Mission. Skip this screen and move left to Screen 8 - The Ole Hotel. |
|
 Zorro (SCREEN 8) by Datasoft |
Zorro (SCREEN 9) by Datasoft |
|
33) Screen 8 – The Ole Hotel (Rose) Yep, here we go again! This time you need to collect the rose from the locked room at the top left of the screen, to give to the Senorita, so you can successfully rescue her! Climb up the ladder and move left, fall down onto the couch and jump off left. At the bottom of the screen, to the left of the ladder, you will see a black key. Collect the key and move to the yellow Hotel couch. Jump onto the middle of the couch and bounce up and down a few times. Jump hard right to reach the ledge above. Climb down the ladder on the right and move right to Screen 9. 34) Screen 9 – The Mission Climb the ladder on the right, and then move left and climb up the other ladder. Move right to the last ladder and climb up to reach the ledge. Move to the edge and Jump left to the bell towers. Move to the end of the ledge and jump left to the lower platform (which is the Ole Hotel) and continue left to Screen 8. 35) Screen 8 – The Ole Hotel (Rose) Jump left off the ledge to the locked door on the platform below. Walk through the door with the key, which will unlock it. Move to the end of the ledge and jump left to the open room, which stores the Rose. Collect the Rose and jump right off the ledge and fall all the way down to the couch. Wait until you stop bouncing to regain your balance. Then bounce a few times, and jump hard right to the platform above, move right and climb down the ladder, move right to Screen 9. 36) Screen 9 – The Mission Your worst nightmare is now about to come true! Unfortunately, you cannot move to Screen 20 and cross the Fort bridge to rescue the Senorita, the drawbridge is always up. Remember that open tomb? Now its time to venture down there again! Yes, you have to navigate the catacombs all over again, except this time there are no moneybags to guide you! This part of the game was really unfair – because if you did not make a map first time around, you almost certainly would never be able to finish the game. Cruel! Fortunately, that’s not a problem now – use the Catacomb Map above, on Step 28, to help you through the Catacomb Maze. When you are ready to continue, move right above the opened tomb and use the ladder to climb down to Screen 10. |
|
|
Zorro (SCREEN 10) by Datasoft |
Zorro (SCREEN 19) by Datasoft |
|
37) Screen 10 – The Catacombs (Screen 1 of 7) Follow the same procedure as before in Step 28 above, using the disappearing platforms, moving and non-moving ladders and ledges to move through the catacombs. There is a Catacomb Map above in Step 28, use it for reference, to help you through the Catacomb Maze again. When you reach the entrance to Sergeant Garcia's Fort, as before, it will be decorated with three symbols, the Golden Goblet, Horseshoe and the Boot. You will now need to follow the same procedure to avoid the shooters and Garcia guards to reach the Senorita on Screen 19, see Step 29 and 30 above. However, this time it will be a little easier, you do not need to rescue the prisoners, as you have already done that. Make your way through Screen 17 and 18 and onto Screen 19. 38) Screen 19 - The Fort (Senorita!) Use the same procedure as before in Step 31 above, to rescue the Senorita. This time though because you have the rose, she will show gratitude, with a kiss and then some more kisses! Eventually some 'apparently' romantic music will play and hearts will emanate from the both of you and fly around the screen. How sweet. Yes, this is it, the moment you have been waiting for, the Senorita is rescued and she is yours. As an end game sequence, it's not too bad. Was it all worth it? Hmm… In the main category of the games database you will find the game Zorro, including external links to other Zorro content. If you would like to comment on this article then please use the comment/rating feature available, or talk about it in the discussion forum. Article reproduced from original Zorro walkthrough by Paul Newport - this is the first time this walkthrough has been published on the internet. |
|